imagineering the web
Hi there, I'm Praseetha KR, a Software Engineer specialized in web application development. This website contains my notes on programming, design, experiences and other musings.
Recent Posts
-
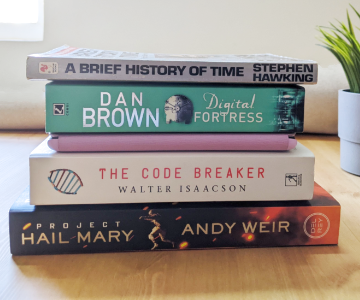
5 books I loved reading in 2022
Yearly book recommendation -
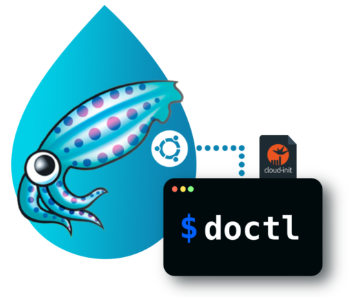
Set up a Proxy Server Droplet in less than 5 minutes
Squid proxy in Ubuntu 20.04 configued via cloud-init, hosted in DigitalOcean droplet managed via doctl -
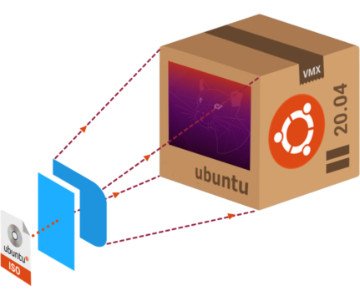
Packer build using Ubuntu 20.04 server ISO
Packer build config for Ubuntu server: subiquity vs debian-installer -
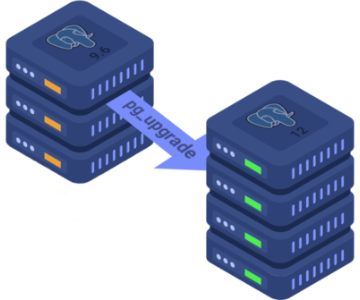
Migrating the data for PostgreSQL major version upgrade
How to upgrade postgres databases from version 9.6 to 12 in Ubuntu -
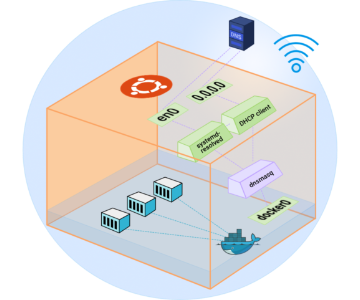
Docker container DNS resolution issue in air-gapped network
Issue with DNS server list realtime sync between Ubuntu Host and Docker Containers running in bridge mode -
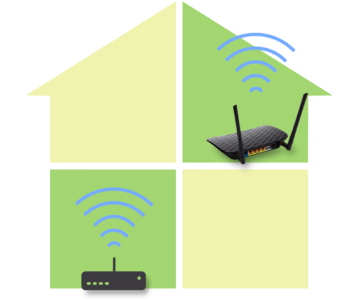
Setting up TP-Link Archer C2 Router as a Repeater
How to run TP-Link Archer C2 AC750 Wireless Dual Band Gigabit Router in Repeater mode


Design Projects

MetaRefresh 2014
From website to event branding, I covered the complete design work required for MetaRefresh 2014 conference. The theme of the conference was intersection between design and code, which indeed aligned with my core skills and perspective, hence I thoroughly enjoyed the complete process. This website got featured by designmodo as a properly structured conference website.
Color palette
Website design & Development
Stage design
T-shirt design
Badge design
Banners design

Eventifier Legacy
I handled frontend on creating Eventifier version 2 using Django templates, Bootstrap & SASS. Created style guide, partial templates for repeatable blocks, standardised CSS utils & structuring and performant embeds.
Webapp dashboard design & development

Flutter Clock
Developed sample clockfaces for the flutter clock challenge.
Clock face design

Rootconf 2014
From website to event branding, I volunteered for the complete design work required for Rootconf 2014 conference. Created designs related to servers & admins for the DevOps conference. It was real fun working on this project, I got an opprtunity to see a data centre for the first time!
Color palette
Website design & Development
Stage design
Badge design
Banners design
T-shirt design

Eventifier
The most fun project & team I have ever worked! This was Eventifier enhanced version with support for brands. An AngularJS app with extensive moderation options, realtime support and high performant embeds & livewalls with customization options.
Visual design
UI/UX
Webapp development
SEO

Pothi.com
A freelance project with Mudranik Technologies, revamping self-publishing platform pothi.com. Moving marketing pages out of Drupal, re-structure the static pages and having a consistent modern design language which can be extended to e-commerce website as well. It was fun working with the team.
Color scheme
Design language
Static pages design & Development

PythonExpress
Volunteered for pythonexpress.in logo & website design. Setup basic design templating & design and collaborated on the development process.
Logo
Website design & Development

JSFoo 2014
Volunteered with HasGeek on designing & developing website for JSFoo 2014.
Color palette
Website design & Development
