This article gives a walk through setting up of HTTPS protocol for localhost using NGINX in OSX (10.11.5).
Prerequisites:
1. openssl
OSX by default comes with openssl.
$ openssl version
OpenSSL 0.9.8zh 14 Jan 2016
2. nginx
Install:
$ brew install nginx
$ nginx -v
nginx version: nginx/1.10.1
3. a local server
Start your local development server.
(For eg: this can be just an index.html file with ‘hello world’ inside /local_website).
$ cd /local_website
$ python -m http.server 8000
4. [optional] Adding alias for local website
Instead of accessing as localhost you can optionally provide an alias for your local website in /etc/hosts
127.0.0.1 local.website.dev
Setting Up HTTPS for localhost
Websites need an SSL certificate to work on HTTPS. Usually it is signed & issued by CAs (Certificate Authorities). We will generate a self-signed certificate for our local testing.
STEP 1: Generate Self-signed SSL Certificate
Openssl can generate a self-signed SSL certificate & private key pair with the following command (generated files will be in the current directory).
$ openssl req -x509 -sha256 -nodes -newkey rsa:2048 -days 365 -keyout localhost.key -out localhost.crt
This command will ask for the following info:
- Country Name
- State or Province Name
- Locality Name
- Organization Name
- Organizational Unit Name
- Common Name*
- Email Address
Common Name value should be the domain name of your website. It is
local.website.devin our example.
If you have multiple sub domains, use a wildcard*.website.dev
The generated certificate will be in x509 container format with SHA256 signature algorithm, 2048bit RSA authentication key and is valid for 365 days.
[OPTIONAL]: If you want to view the contents of encoded certificate, do this:
$ openssl x509 -text -noout -in localhost.crt
STEP 2: Trust authority of the certificate
When browsers get the certificat from server, the authenticity is verified by checking with existing CAs. Browser has a list of trusted CAs by default, if the certificate issuer is not there, then browser will be showing a security warning ‘untrusted connection’.
Our generated certificate is self signed, so browser will give security warning. In order to bypass that, we will manually verify the trust of certificate.
In OSX, you can do that in Keychain access as shown below: (or, open keychain access ui and add cerificate there).
$ sudo security add-trusted-cert -d -r trustRoot -k /Library/Keychains/System.keychain /path/to/file/localhost.crt
Note: this will work only on chrome & safari, because those browsers check keychain access to get list of CAs. Firefox stores its own list of trusted CAs in the browser, so firefox will still throw the security error.
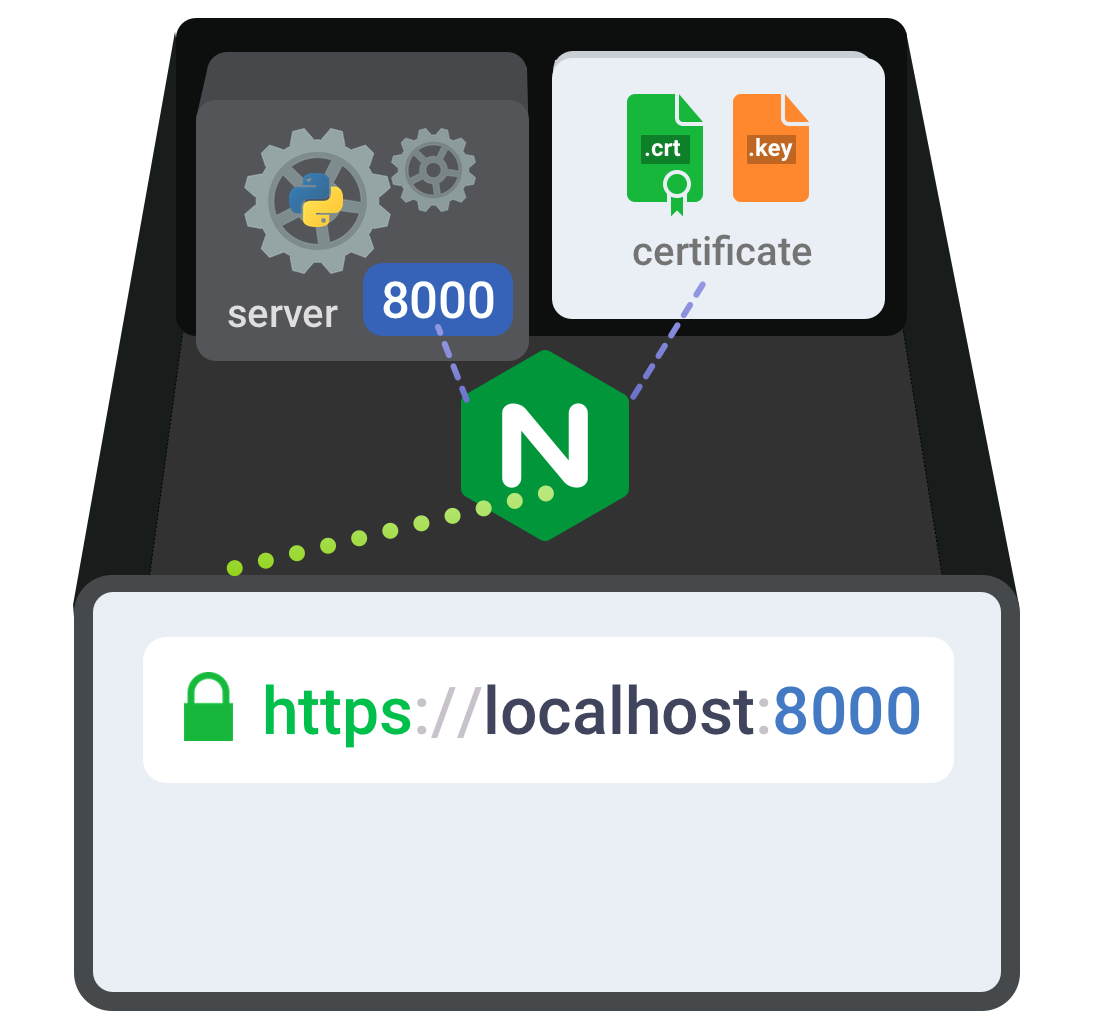
STEP 3: Configure & Reload nginx
Here is a sample nginx configuration you can make use of. Save its as nginx_custom.conf
|
|
Start/reload nginx:
$ sudo nginx -c /path/to/file/nginx_custom.conf
$ sudo nginx -c /path/to/file/nginx_custom.conf -s reload
Final step
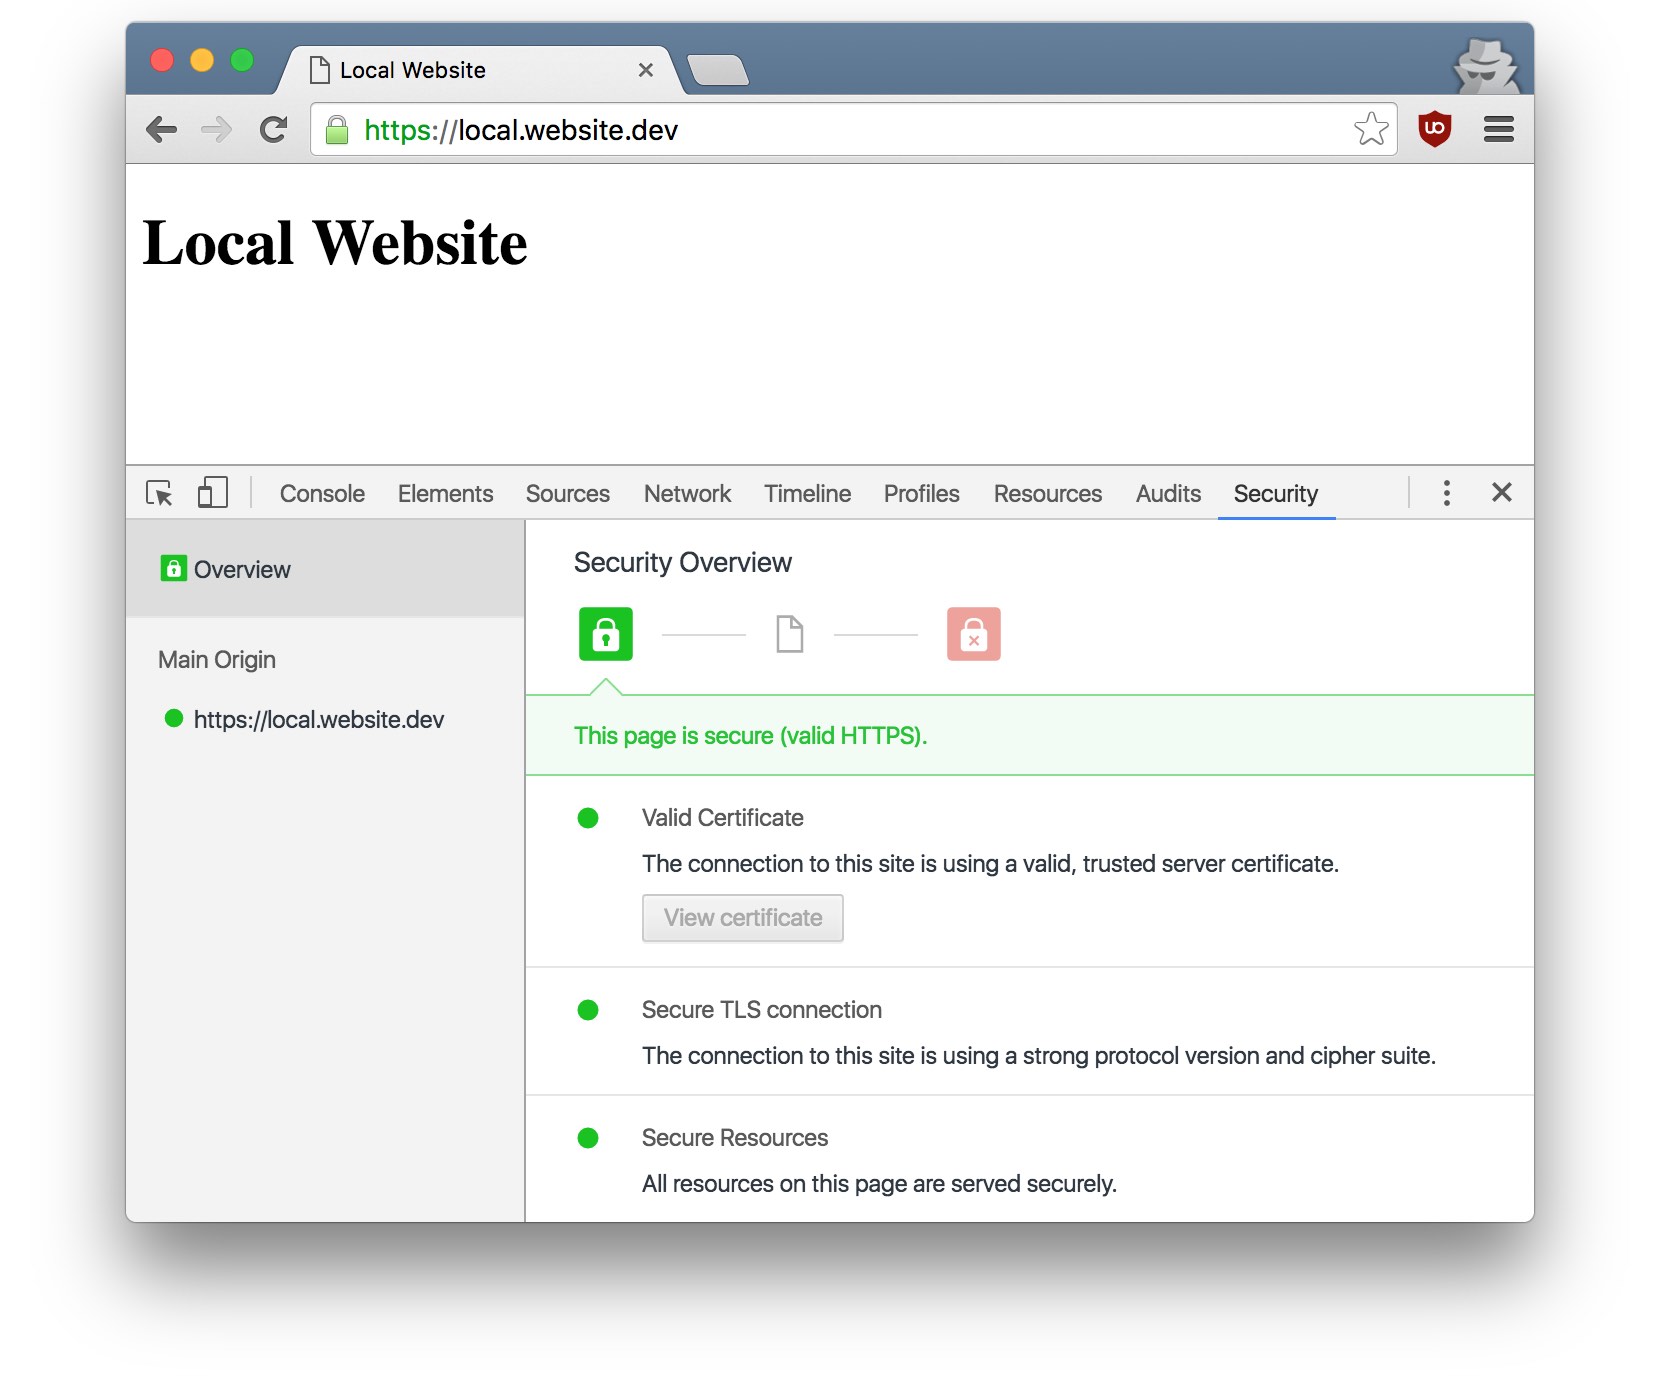
Access https://local.website.dev, you can see that little green padlock icon in the address bar. Yes, your local website is on HTTPS now!